The new Presentations editor builds live presentations that update with your data. You add slides from a set of layouts, fill them with charts, reports, KPIs, text and images, ask ScaleXP AI to make changes for you, and style the whole pack with a Theme that holds your colors, fonts, logo and footer text.
The new Presentations and Themes are available to organizations where they have been switched on. If you don't see them in the sidebar described below, contact ScaleXP support to ask for them to be switched on for your organization. Your existing presentations stay where they are and keep working as before.
1. Open Presentations and Themes
- Go to the Presentations tab in the top menu. This opens your existing presentations.
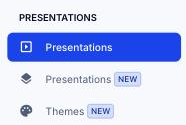
- In the left sidebar, select Presentations (marked NEW) to open the new presentations, or Themes (marked NEW) to manage your themes. The first Presentations item, without a tag, takes you back to your existing presentations.
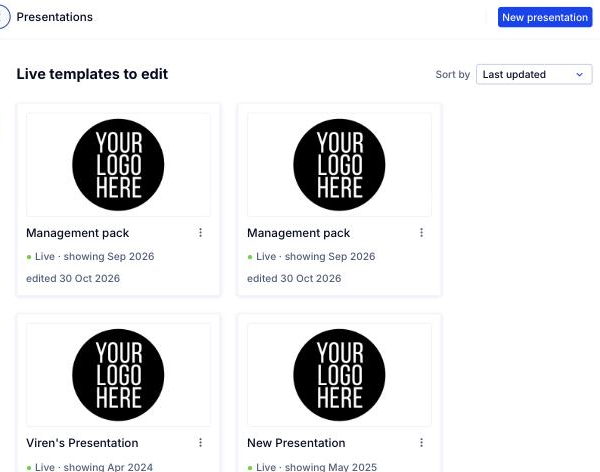
The new Presentations page lists your presentations under Live templates to edit. When you have more than one, use Sort by to order them by Last updated or Alphabetical. Each card shows the period the presentation is showing and when it was last edited.
Guest users who have been given access to individual presentations don't see the new Presentations or Themes yet.
2. Create a presentation
- On the new Presentations page, click New presentation in the top right.
- Either follow the three steps (Choose your presentation purpose, Refine the style and content and Refine the slide detail) and click Generate first draft, or click Create from scratch (or the Blank presentation card) to start with an empty presentation.
The three steps are covered in detail in How to create a new presentation with the help of AI. On the Refine the style and content step you can already pick the Theme and set the Confidentiality footer.
3. Find your way around the editor
Your presentation opens in the editor, marked Live · updates with your data. Changes save automatically, and the header shows Saving… and then Saved. Along the top of the editor you can:
- Rename the presentation by typing in the name box.
- Click the star to Star the presentation.
- Use Undo and Redo (or ⌘Z / Ctrl+Z and ⌘⇧Z / Ctrl+Shift+Z).
- Change the period the whole presentation reports on with Date for:, and change the currency in the box next to it.
- Click Present to show the current slide full screen.
- Click Download PowerPoint to export the presentation (see section 9).
- Click Settings to choose the theme and footer for this presentation (see section 8).

The slide list runs down the left of the editor. Click a slide to open it, or use the arrows below the slide to move between slides.
4. Add and arrange slides
- Click New slide at the bottom of the slide list.
- Pick a layout. Each layout has a short description, for example Title slide, Section break, One content area, Two side-by-side areas, Four content areas, Content with a commentary column, A KPI strip above content, KPIs, content and commentary or Start empty.
The new slide is added after the slide you are on. To change a slide, click Slide options (the three dots) and choose from:
- Change layout: switch the slide to another layout.
- Show title and Show logo: turn the slide title and the theme logo on or off for this slide.
- Theme background, No background or Custom image: use the theme's background, no background, or upload a PNG or JPEG image (20MB or smaller) for this slide only.
- Duplicate, Move up and Move down.
- Delete slide: you can undo this with ⌘Z / Ctrl+Z.
5. Add and edit content
Empty areas of a layout show a placeholder (for example Chart, Table or Commentary). Click a placeholder to fill it, or click Insert block below the slide to add content anywhere on the slide. You can add:
- Text: a title, body text, commentary or a label.
- Chart: a chart from your Dashboards.
- Report: a table from one of your Reports.
- Grid: a simple table you fill in yourself.
- KPIs: KPI cards.
- Image: an image you upload.
Click any block on the slide to select it. You can drag it to move it, resize it, or press Delete to remove it. A toolbar appears with the options for that kind of block:
- Text: click Edit (or press Enter) to type, and Exit edit mode (or press Esc) when you are done. On commentary you can also click Update commentary or Replace with AI commentary to have ScaleXP AI write it from your data.
- Chart: Change chart, Edit original chart, Comparisons (Budget, Prior month, Prior year) and Show legend or Hide legend.
- Report: Change report, Edit source report, Table format, and Show or hide rows and columns. If a report has more rows than fit, the table tells you how many rows don't fit and how to make them fit.
- KPIs: Change KPIs, KPI options and Card style.
- All blocks: Style, Remove block, and for charts, reports and KPIs, Refresh from source.
To compare against a budget, you need a budget loaded in ScaleXP. See How to add a budget or forecast.
6. Edit with ScaleXP AI
- In the editor, click ✦ Edit with ScaleXP AI in the top right corner of the slide. The ScaleXP AI panel opens, showing the slide you are on and, if a block is selected, which block.
- Type what you want in Ask for a change to this slide, or click one of the suggestions above the box to start from it. For example, ask to add a page on churn with AI commentary, or to hide the title on this slide.
- Click Send (or press Enter).
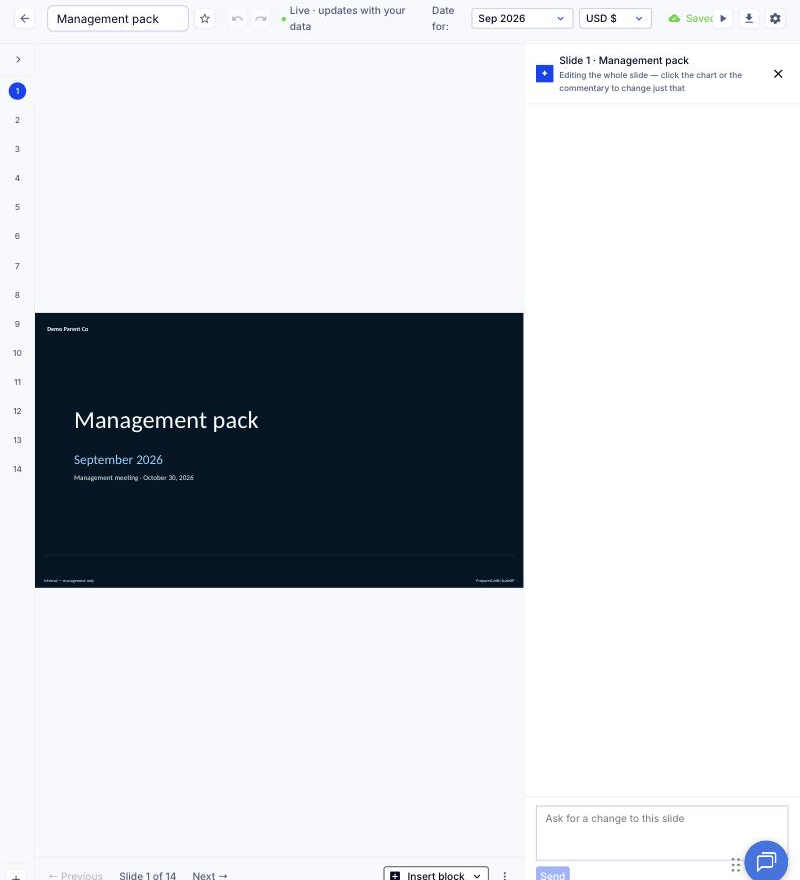
ScaleXP AI makes the change and replies in the panel. Replies can include bold text and bullet lists, for example a list of what was added. If ScaleXP AI adds a new page, the editor moves to that page so you can see it. When the new page has AI commentary, you see Generating commentary… and then Commentary updated as the text fills in. You can keep chatting while it runs.
If you don't like a change, click Undo under the reply. ScaleXP AI works from your live data and does not make up numbers.
7. Create and edit a theme
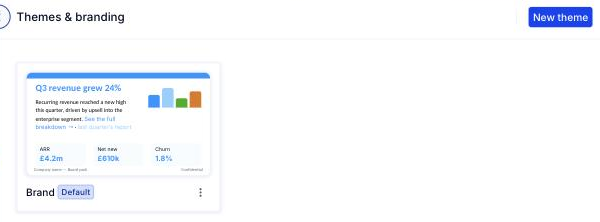
- Select Themes (marked NEW) in the left sidebar. The Themes & branding page shows a preview of each theme, and the default theme is marked Default.
- Click New theme in the top right, or click an existing theme to edit it.
- Change the settings on the right. The Live preview · sample slide on the left updates as you go.
- Click Save and exit.
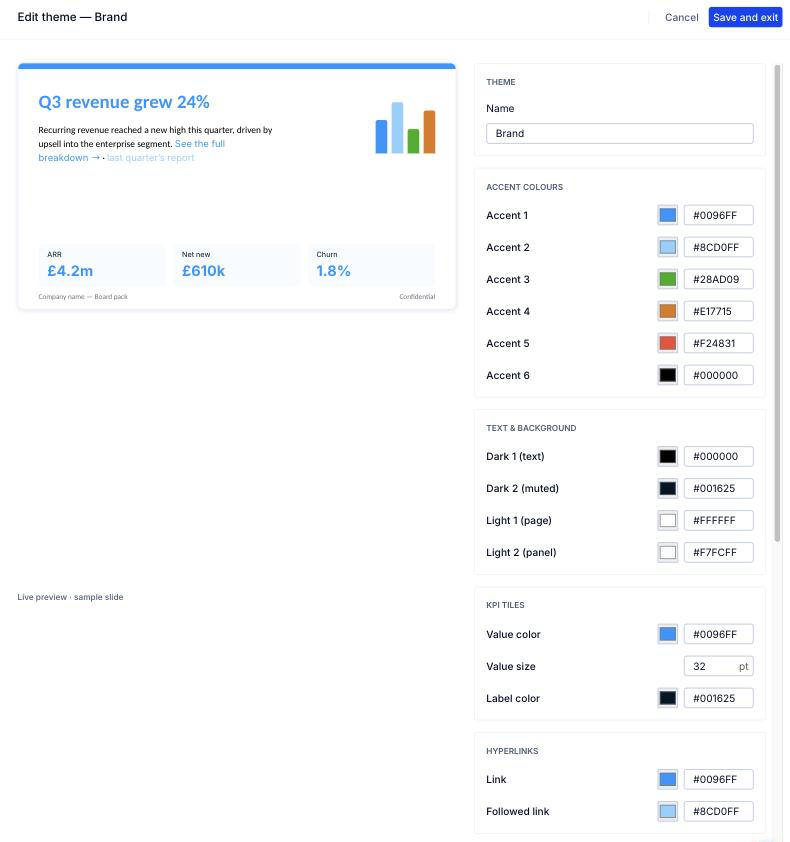
A theme controls:
- Theme: the theme's Name.
- Accent colors: Accent 1 to Accent 6.
- Text & background: Dark 1 (text), Dark 2 (muted), Light 1 (page) and Light 2 (panel).
- KPI tiles: Value color, Value size and Label color.
- Hyperlinks: Link and Followed link colors.
- Fonts: Headings (major) and Body (minor), chosen from Arial, Calibri, Cambria, Georgia, Segoe UI, Times New Roman, Trebuchet MS and Verdana.
- Branding: a Logo URL or Upload logo (PNG or JPEG, 20MB or smaller), Remove logo, Footer text and Confidentiality text.
- Cover: the cover style (Bar or None), Upload background and Remove background, and whether the background shows on All slides or Cover slides only.
- Set as default: make this the theme presentations use when no other theme has been chosen.
Each color can be picked with the color picker or typed as a hex value. To make a theme the default or remove it from the Themes & branding page, click Theme options (the three dots) on its card and choose Set as default or Delete.
8. Apply a theme to a presentation
- Open the presentation and click Settings in the top right of the editor.
- Under Presentation settings, choose a Theme. The whole presentation updates straight away.
- Optionally, turn on Enable page number and type a Confidentiality footer for this presentation.
To change the theme itself, click Edit theme & branding. This opens the presentation's theme in the theme editor, and Back to presentation returns you to the editor. Changes to a theme apply to every presentation that uses it.
9. Download, lock and roll forward
Download as PowerPoint. In the editor, click Download PowerPoint. ScaleXP prepares a .pptx file in your theme. Afterwards, ScaleXP suggests locking the version you sent: click Lock this version or Not yet.
Lock a version. Locking freezes the figures and commentary for that period, while the live presentation stays editable. Click Presentation options (the three dots) on a card on the new Presentations page, choose Lock this version, then click Lock. Locked versions are listed under Saved presentations (locked) on the same page, where you can Open or Download them. When you open a locked version, click Make an editable copy to start a new live presentation from it.
Roll forward to the next period. From the same Presentation options menu, choose Roll forward to the next period, then click Roll forward. This moves the whole presentation to the next period and regenerates its AI commentary. Hand-written text is kept and flagged for review, and you can undo the roll forward from the editor.
The same menu also has Open, Duplicate and Delete.