You can create, edit, move and delete report columns, and choose the time period each one shows.
1. Open the column editor
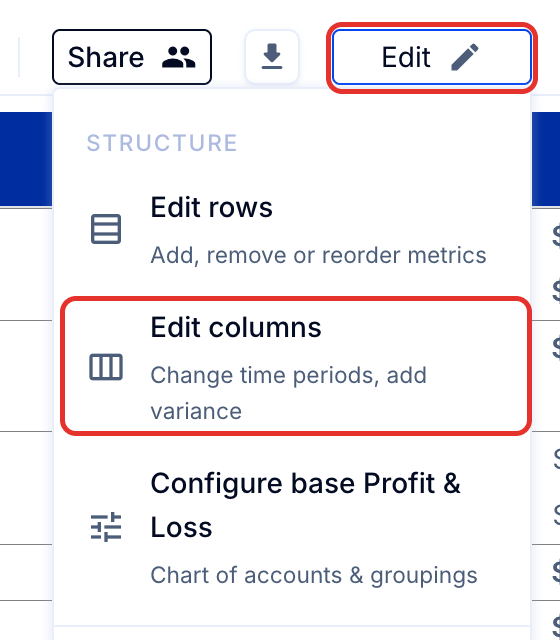
- Go to Reports (top bar) > Edit (top right) > Edit columns.
- Either use the dropdown menu (top of page) to select from a list of preset and previously created column configurations, or create a new column configuration with + New column layout.
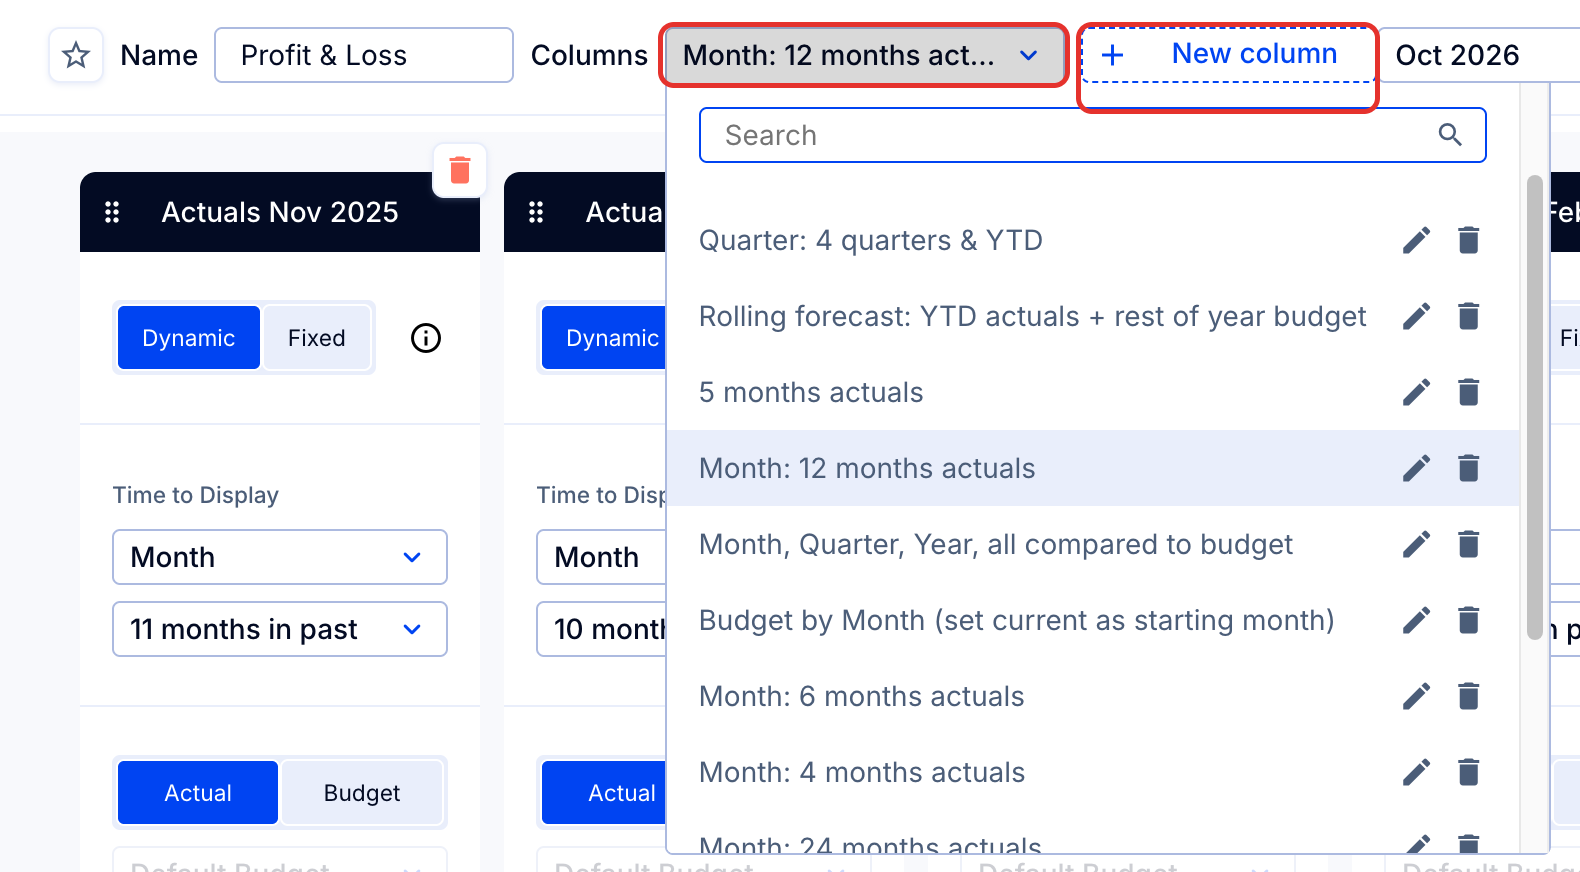
- Edit the columns shown by deleting, changing, and/or adding new ones.
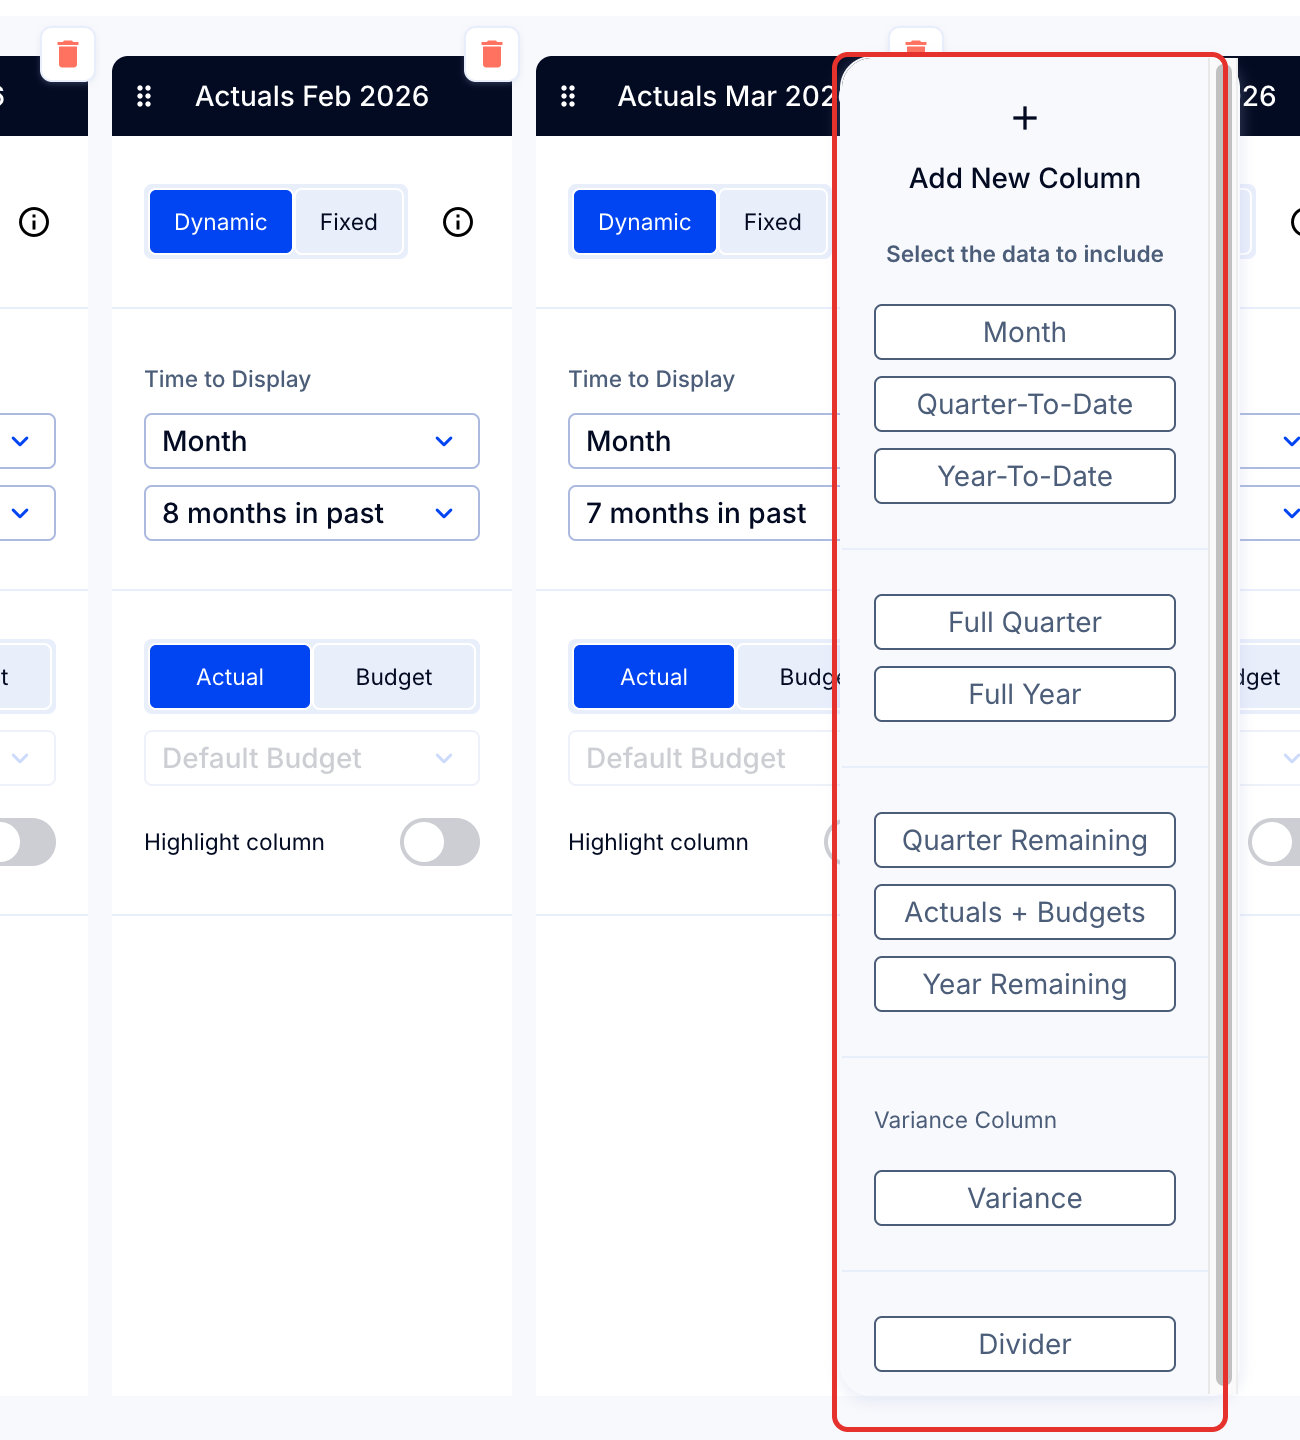
- To add a column, use the floating window on the right where you will see various options for the new column time periods, plus an option to add a new vertical divider.
Note: Columns can also split a report by legal entity and by tracking codes or classes.
2. Choose a time period
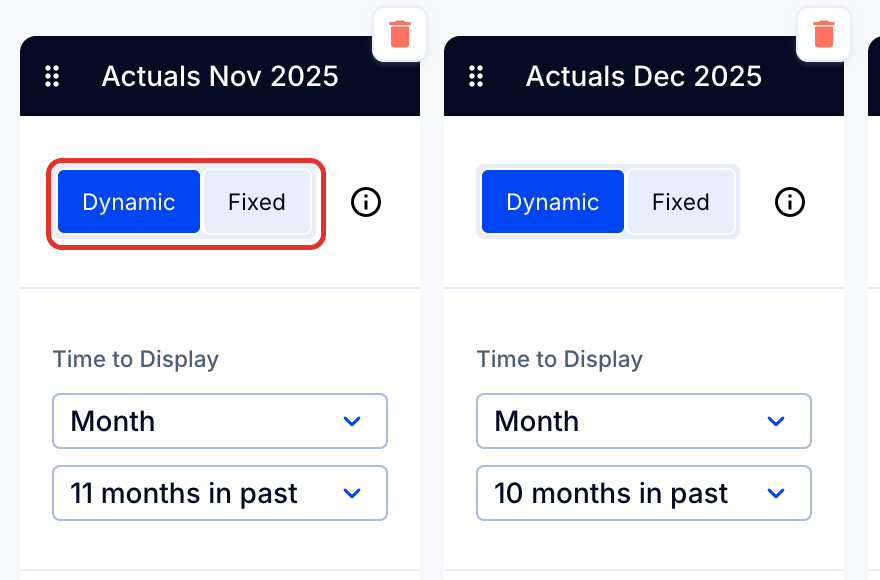
- On the column, choose Fixed for a fixed start and end date or Dynamic for dates that move relative to the reporting month selected. A Fixed Quarter or Year column whose dates don't line up with your financial quarters or years splits into one column per quarter or year, each covering only the months you chose.
The options for time period, any of which can be used for reporting on Actuals, Budgets/Forecasts, or Tracking Codes/Classes are:
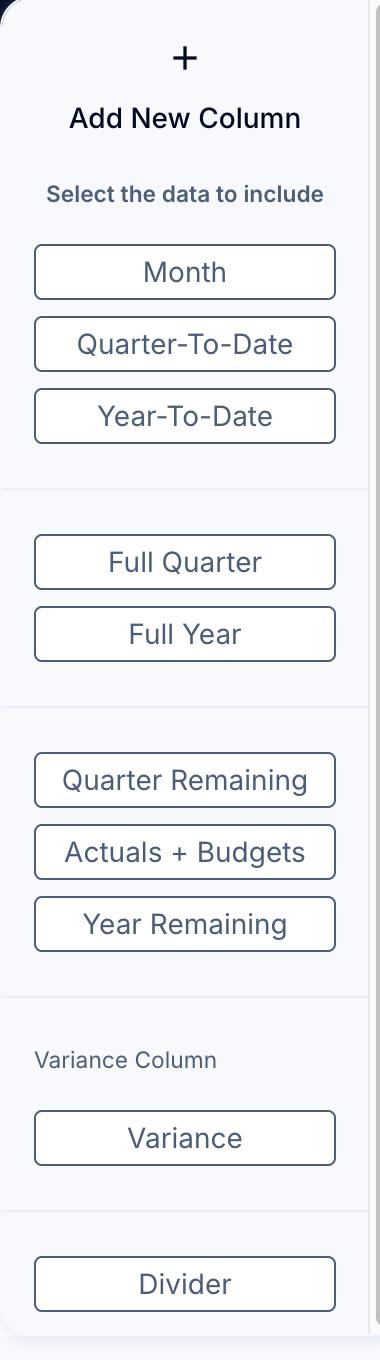
- Month: Choose a single current, past or future month in the dropdown menu once the month column has been created (second menu below Time to Display).
- Quarter-To-Date: All the months in the quarter until the selected time period, using the company's fiscal year starting date. Choose a past, current or future quarter in the dropdown menu on the column.
- Year-To-Date: All months in the selected financial year until the selected time period. Choose a past, current or future year in the dropdown menu on the column.
- Full Quarter: All three months in the quarter selected. Choose a past, current or future quarter in the dropdown menu on the column.
- Full Year: All twelve months in the selected year. Choose a past, current or future year in the dropdown menu on the column.
- Quarter Remaining: Amounts for months in the quarter after the reporting month selected; usually used for reporting future budget or forecast.
- Actuals + Budgets: Adds together the Year-to-date plus Year Remaining for the current financial year.
- Year Remaining: Amounts for months in the year after the reporting month selected; usually used for reporting future budget or forecast.
- Variance: Calculates the difference between two selected columns as either a number or a % change. Choose Type: Amount or % at the top of the column. Choose columns to compare in the boxes below that.
- Divider: Adds a divider between columns.
Tip: To create reports with a fixed start date or time period, see How to create reports with a fixed start date or fixed time period, such as financial year.
Tip: To change the format of variance columns to show favorable / unfavorable variances in black and white rather than color, go to Organization Settings on the Settings page, as shown in How to change variance colors and the definition of good vs bad.
3. Move, delete, and highlight columns
- Select a column.
- Then do any of the following:
- To move it, drag the six dots in the column heading (top).
- To delete it, click the red trash icon at the top right of the column.
- To highlight it, once created, turn on the Highlight column toggle in the middle of the column.