If ScaleXP has read the revenue recognition dates on an invoice incorrectly, you can correct them on the Customers tab, in the bulk invoice editor, or in your accounting system. Use Option 1 for a single invoice, Option 2 to change a lot of dates at once, Option 3 to review dates for one invoice issue month, Option 4 to fix the description in your accounting system, and Option 5 for large changes to historic invoices.
Option 1: Edit directly on the Customers tab
- On the Customers tab (top navigation menu), open your Revenue Recognition report (for example 1. Revenue Recognition), select the revenue recognition time period you wish to review and scroll down to the customer name.
- Click the down arrow button next to the customer’s name. This shows the detail of invoices issued.
- Click the open icon (a box with an arrow) next to the relevant invoice. A pop-up window shows full details of the invoice. For Xero and QuickBooks invoices, you can also click Open in Xero or Open in QuickBooks in the invoice details to open the invoice in your accounting system.
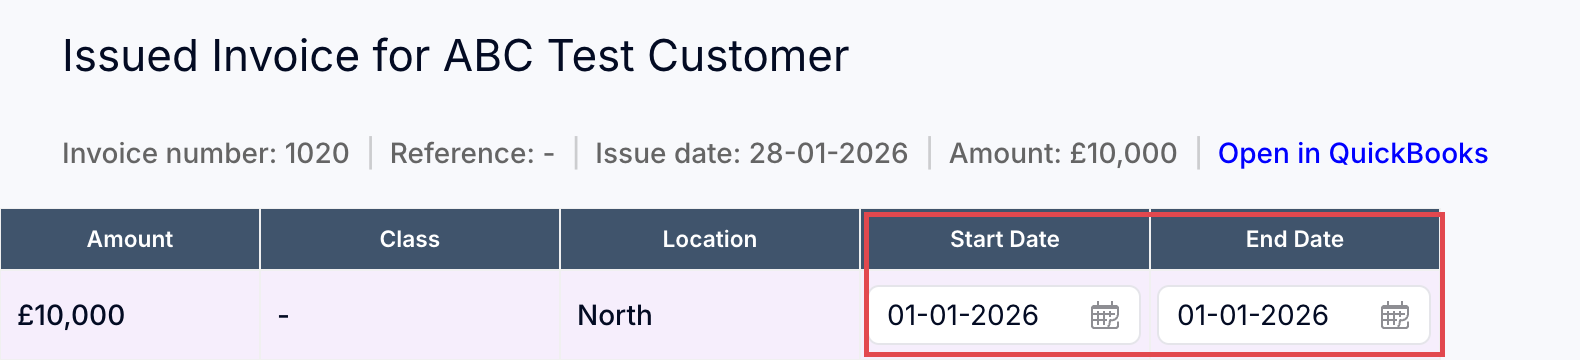
- To change the dates, either type over the date or click the calendar and select the new date.
- Click Save changes at the bottom right of the window.
Important: Remember to click Save changes.
Option 2: Use the bulk invoice editor
If you want to change a lot of dates at once, use the bulk invoice editor.
- On the Customers tab, click the three dots icon at the top right and open the bulk invoice editor.
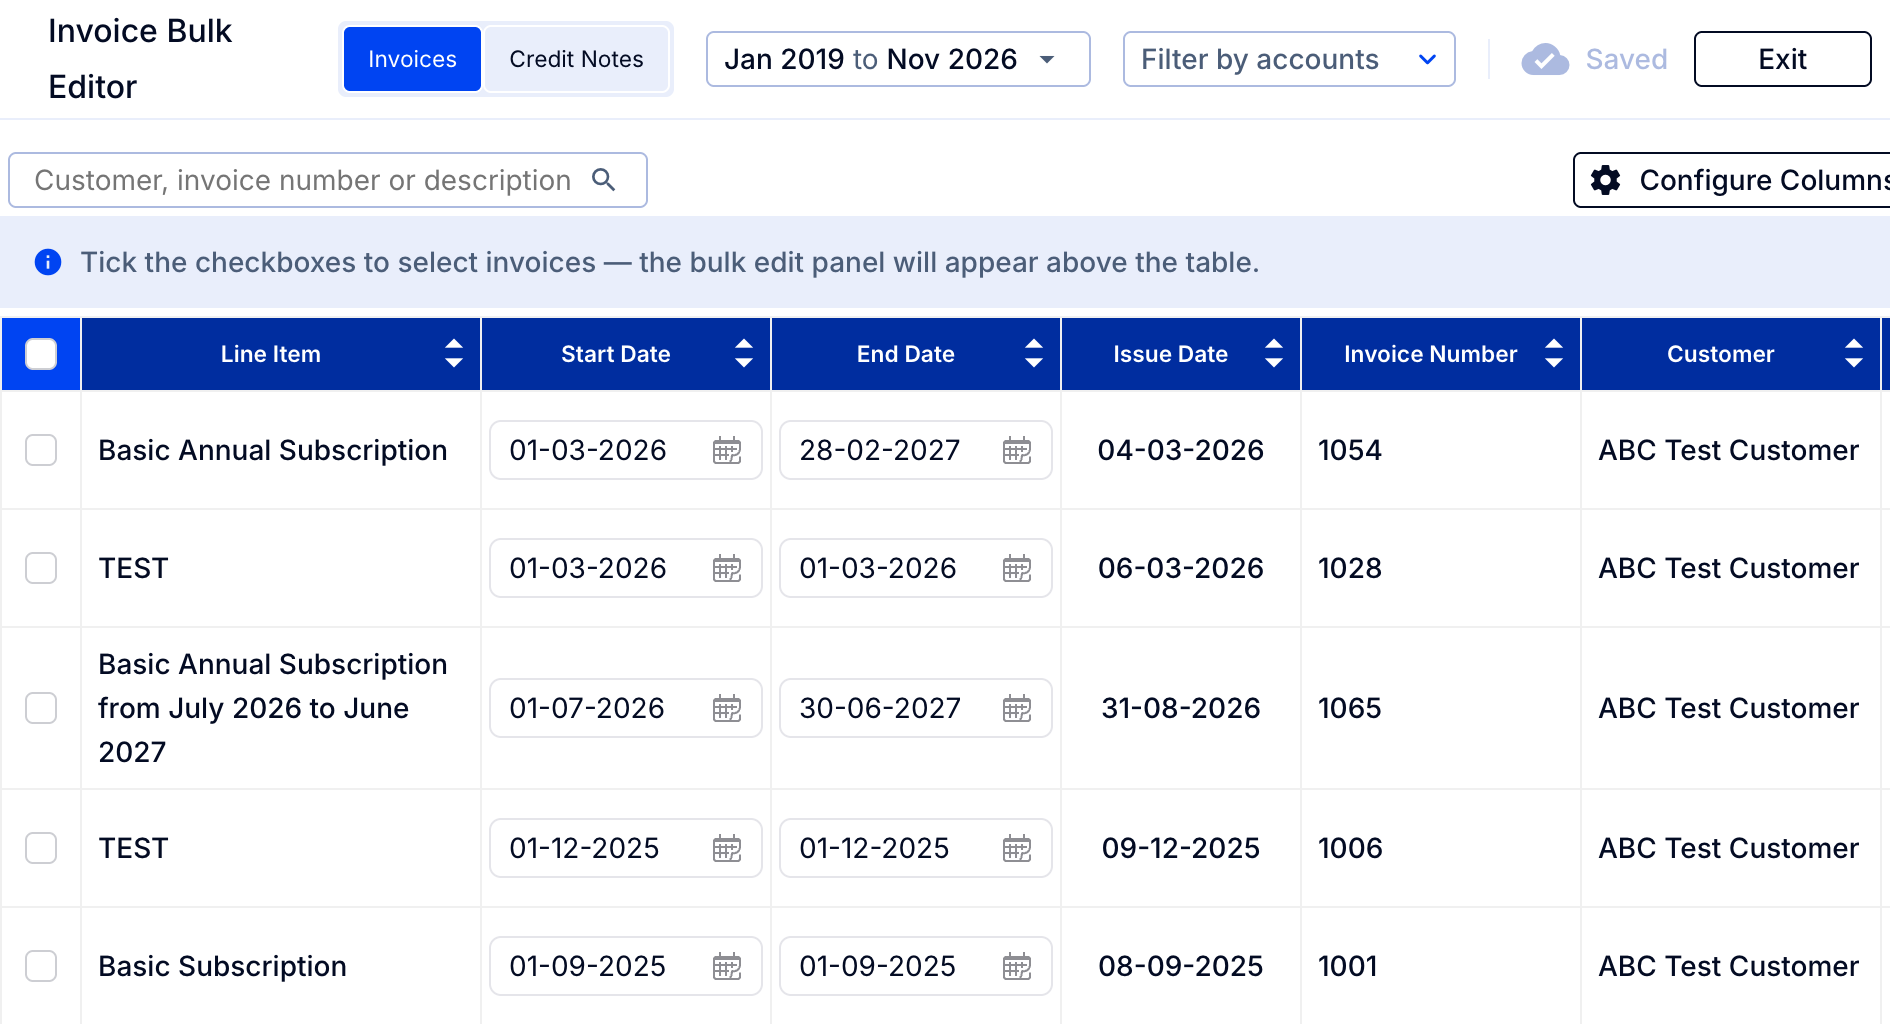
For the full steps, see Bulk invoice editor: How to edit multiple invoices at once.
Option 3: Review invoices issued in a specific month
To quickly review start and end dates for a single invoice issue month, use the New Customer Invoices page.
- Go to the Journals tab and open New Customer Invoices in [month].
See more in How to review invoices issued in the month and download a list in Excel; how to find a missing invoice.
Option 4: Change the line item description in your accounting system
- In your accounting system, change the line item description to meet the best practice rules described below.
- Re-sync with your accounting system. The dates will update.
Note: When you change the invoice description in your accounting platform, ScaleXP reprocesses the invoice and defers the revenue accordingly. If you manually overwrite an invoice deferral period, the manual entry deferral holds, even if the description of the invoice is subsequently changed in your accounting platform.
Option 5: Request a manual upload from support
If you need to make a lot of large changes to historic invoices, it may be preferable to request a manual upload service from support.
- Email [email protected] to request a manual upload.
This is often the best option if you need to make large-scale changes to GL codes, want to restate historic GL codes in ScaleXP but not in your accounting system, and/or have a lot of date changes to make and prefer to do it on a spreadsheet which our team can upload for you.
Note: This service is for historic periods only and does not work in conjunction with automated journals, which are based on a live connection to your accounting system.
About changing dates in ScaleXP
Note: ScaleXP will not pass date changes in ScaleXP back to your accounting system. You will need to enter the changes directly into the accounting system.
Why did the system not read the date correctly?
To figure out why the system did not read the date correctly, see How ScaleXP reads dates.
The most common reasons are:
- Not using a space between dates, for example: 05/11/2022-04/11/2023.
- Including other numbers in the description before the date.
Tip: Use the name of the month rather than a number for the month, and the full four digits for the year, so the system can tell the month, day and year apart.