Set where Stripe invoices go, how they are imported and which accounts they post to on the Stripe configuration page, which opens when you click Configure on the Stripe card in Load Data > Connections.
First time? Complete How to connect Stripe to ScaleXP first.
The settings in sections 1 and 2 save as you change them. They can be changed only once a default is saved for Products in section 3. For the full steps for your setup, see How to integrate Stripe and automate invoice creation in Xero, How to integrate Stripe and automate invoice creation in QuickBooks or Stripe and ScaleXP integration: Create invoices directly into ScaleXP.
1. Choose where invoices go
- Under Where invoices go, set Destination:
- Accounting system: each Stripe invoice is created in Xero or QuickBooks.
- ScaleXP: Stripe invoices are held in ScaleXP rather than pushed to your accounting system. You post them to Xero or QuickBooks as a monthly journal (see How to post the Stripe journal).
- If you chose ScaleXP, select a Receivables account and a Tax liability account. Both are required.
Important: Change the destination only before the first import. Once both ScaleXP accounts are saved, Destination can no longer be changed.
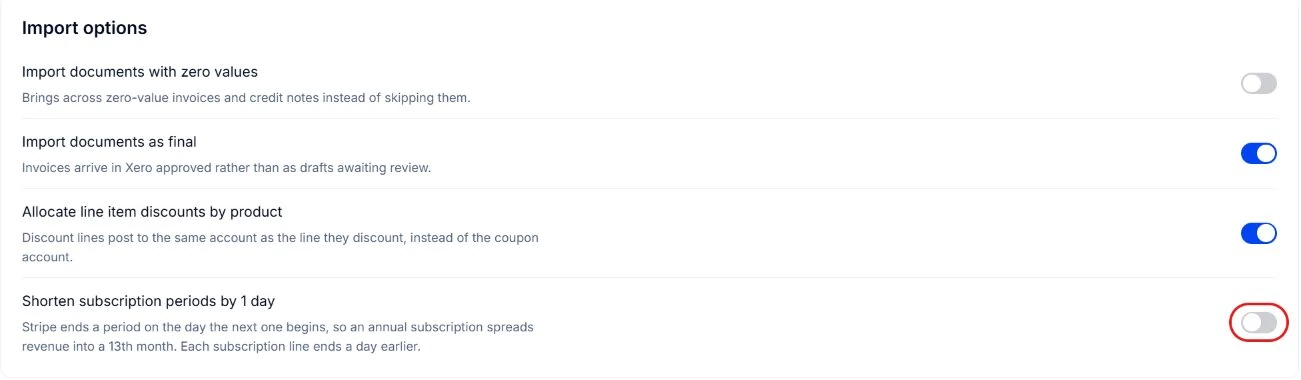
2. Set the import options
Under Import options, turn on the toggles you need:
- Import documents with zero values: brings across zero-value invoices and credit notes instead of skipping them. Once turned on, it can't be turned off here.
- Import documents as final: invoices arrive in Xero approved rather than as drafts. Shown only for Xero with Accounting system as the destination.
- Allocate line item discounts by product: discount lines post to the same account as the line they discount, instead of the coupon account. See How to allocate discounts to line item account codes.
- Shorten subscription periods by 1 day: each subscription line ends a day earlier, so an annual subscription doesn't spread revenue into a 13th month. See How to shorten Stripe subscription periods by 1 day.
3. Map products
- In the Mapping section, click Set up or Edit next to Products.
- Select a Default Account (Xero) or Default Item (QuickBooks). Any product you don't map individually posts to it.
- Optionally, choose an account or item for individual Stripe products.
- Click Save.
Important: The default is the on/off switch for the integration. Until it is set, no Stripe invoices are imported and they are skipped without an error.
The Products and Coupons rows show a status: Needs a default, Using default (some items post to the default) or Mapped.
4. Map coupons
- Click Set up or Edit next to Coupons.
- Select a Default Coupon Account (Xero) or Default Coupon Item (QuickBooks), map any individual coupons and click Save.
Without a default, discounts post against the product's own revenue rather than to your accounting system as a discount.
5. Map tax rates and tracking codes (Xero only)
- Click Edit next to Tax rates, match each Stripe tax rate to its Xero equivalent and click Save.
- Optionally, click Edit next to Tracking codes to send Stripe tracking categories through to Xero. See Stripe: How to automate Xero tracking codes from Stripe metadata.
6. Check the issues log (Xero only)
- Click View next to Issues log to see any data issues found while importing.
7. Map new products and coupons
When you add products or coupons in Stripe, or change accounts or items in your accounting system:
- Click Refresh Stripe data (Xero) or Refresh products (QuickBooks) at the top of the Stripe configuration page.
- Map the new products and coupons as in sections 3 and 4.