Follow these steps to connect a new ScaleXP entity for the first time or to reconnect if your connection link is broken.
Before you start
- ScaleXP currently connects directly to these accounting platforms: Xero, QuickBooks and Zoho Books.
- If you need to set up one or more new entities in ScaleXP, use the new organization setup form and/or contact [email protected].
- For consolidated entities, always connect at subsidiary level and ensure the currency of the ScaleXP entity matches the currency of the accounting platform.
1. Connect your accounting system
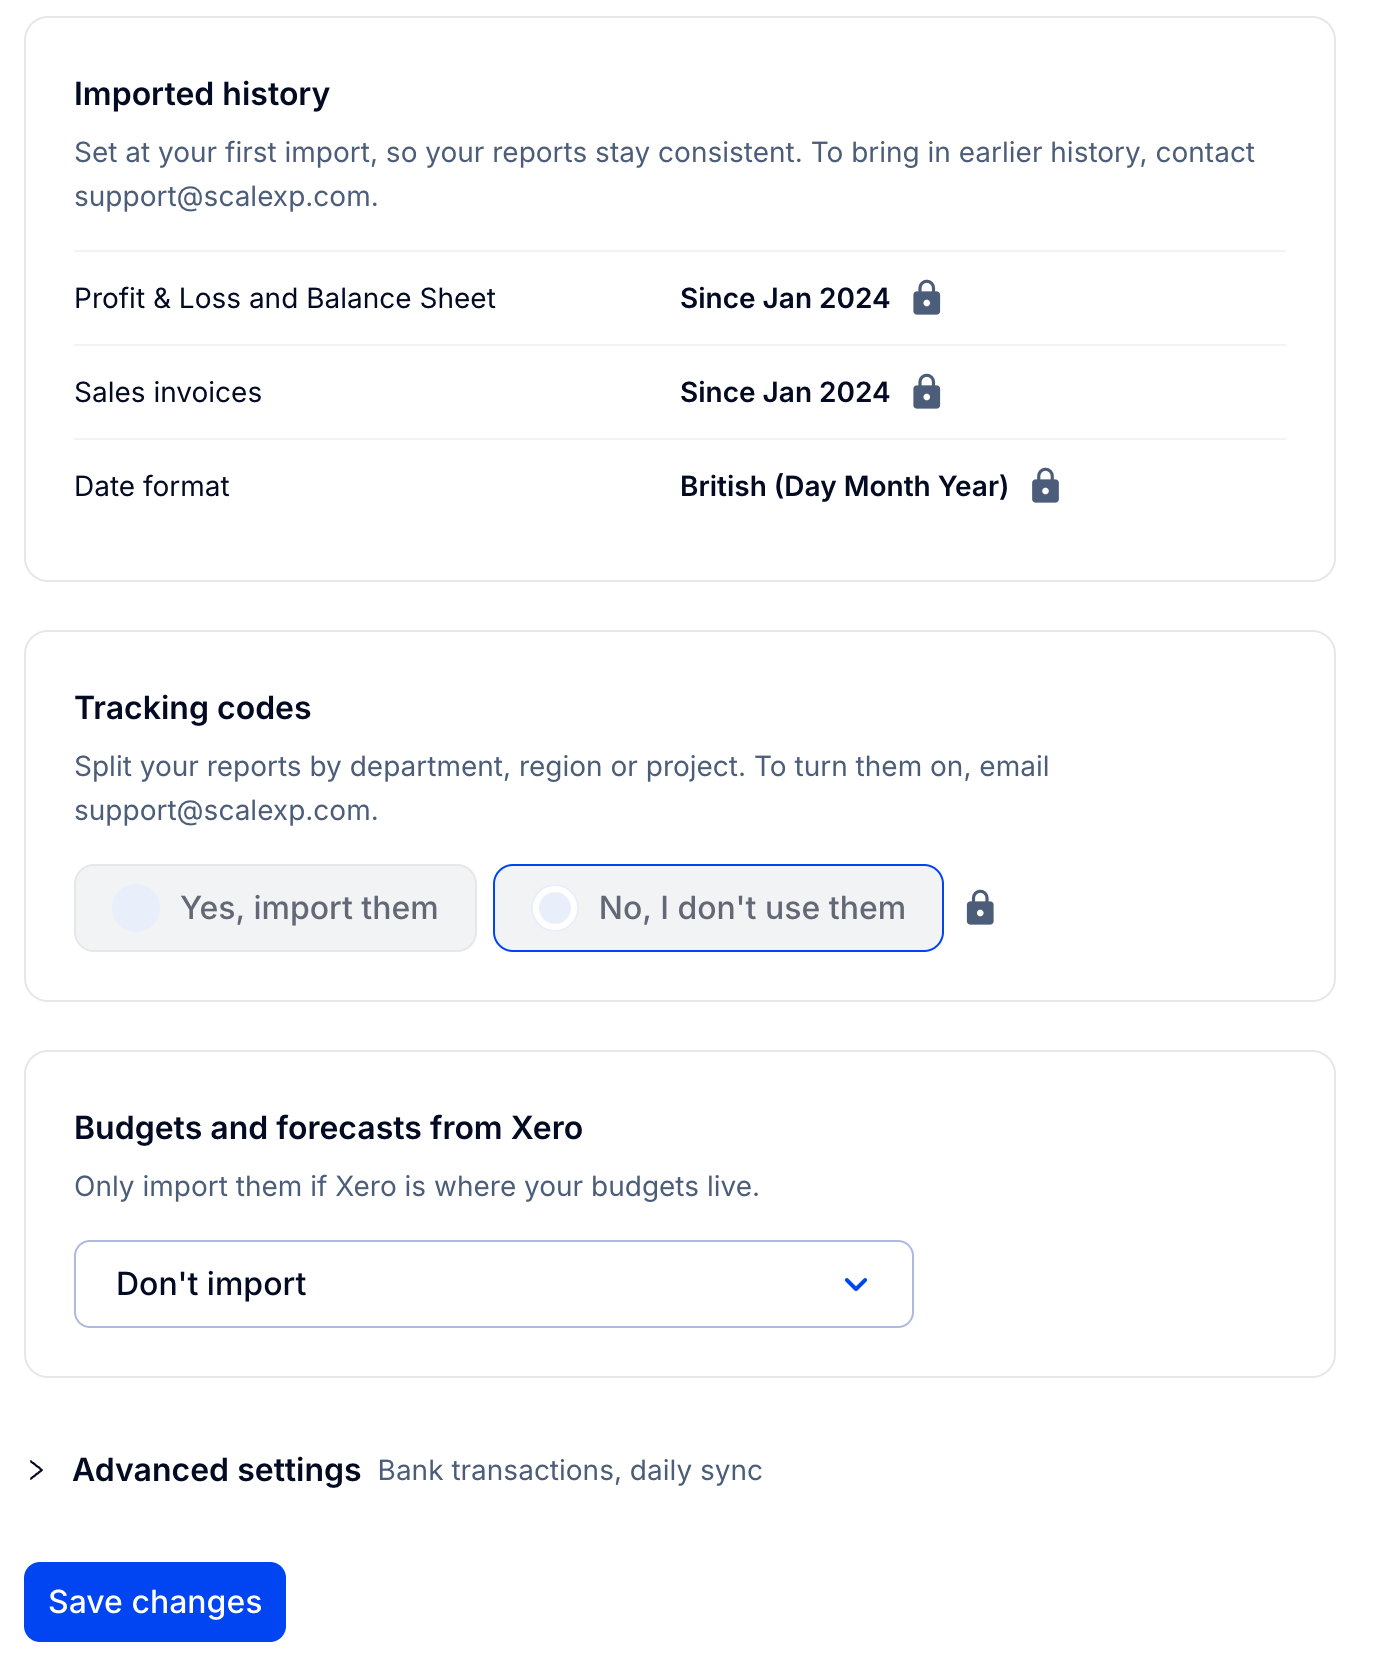
- Go to Load Data (top navigation menu) > Connections (left sidebar) > + Add a Connection.
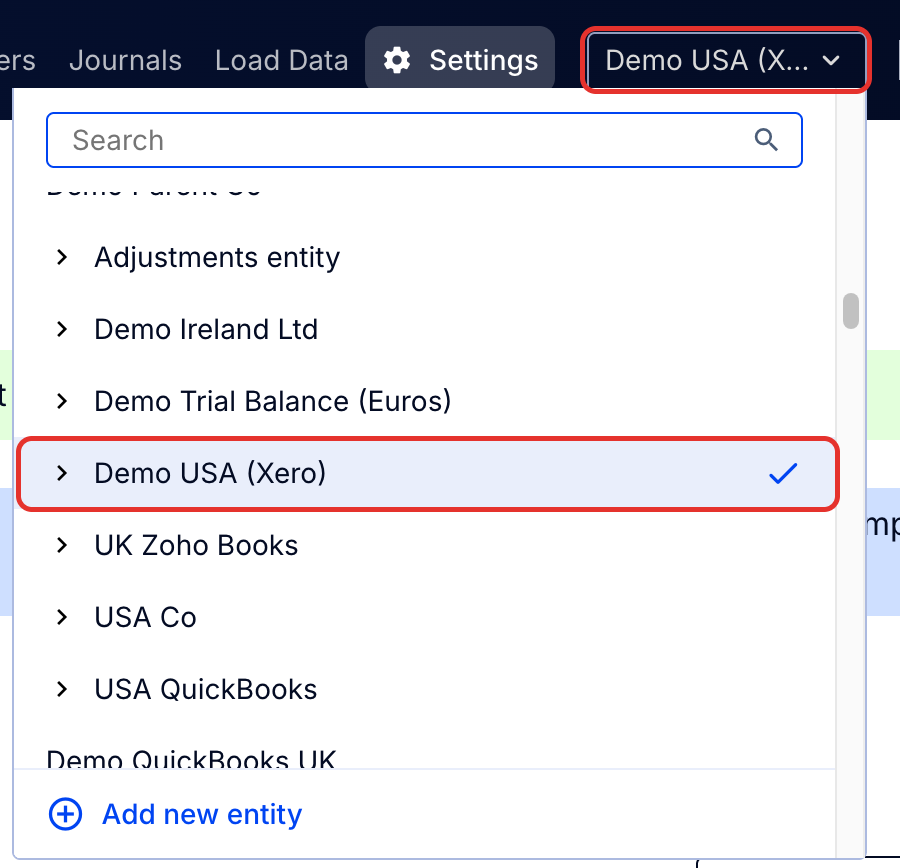
- Select the ScaleXP entity to connect in the dropdown selector (top right).
- Select the accounting system (for example, Xero, QuickBooks, Zoho Books) and follow the prompts to log in to your system. For Zoho Books connections, see Getting started with ScaleXP's Data Consolidation for Zoho Books.
- For Xero and QuickBooks, select the entity to connect. Be careful to select the entity which matches the ScaleXP entity (top right of the ScaleXP page) and that the two are in the same currency.
Note: If the account you wish to connect is not listed, ensure that you have logged into your accounting system with the same email address that you used for ScaleXP, and that the email address has the relevant permissions in your accounting system.
Note: If you need to make a change to the ScaleXP name or currency, contact [email protected].
2. Set your import parameters
Set the parameters for the data you wish to import into ScaleXP. (View settings later in Connections > three dots > Configure.)
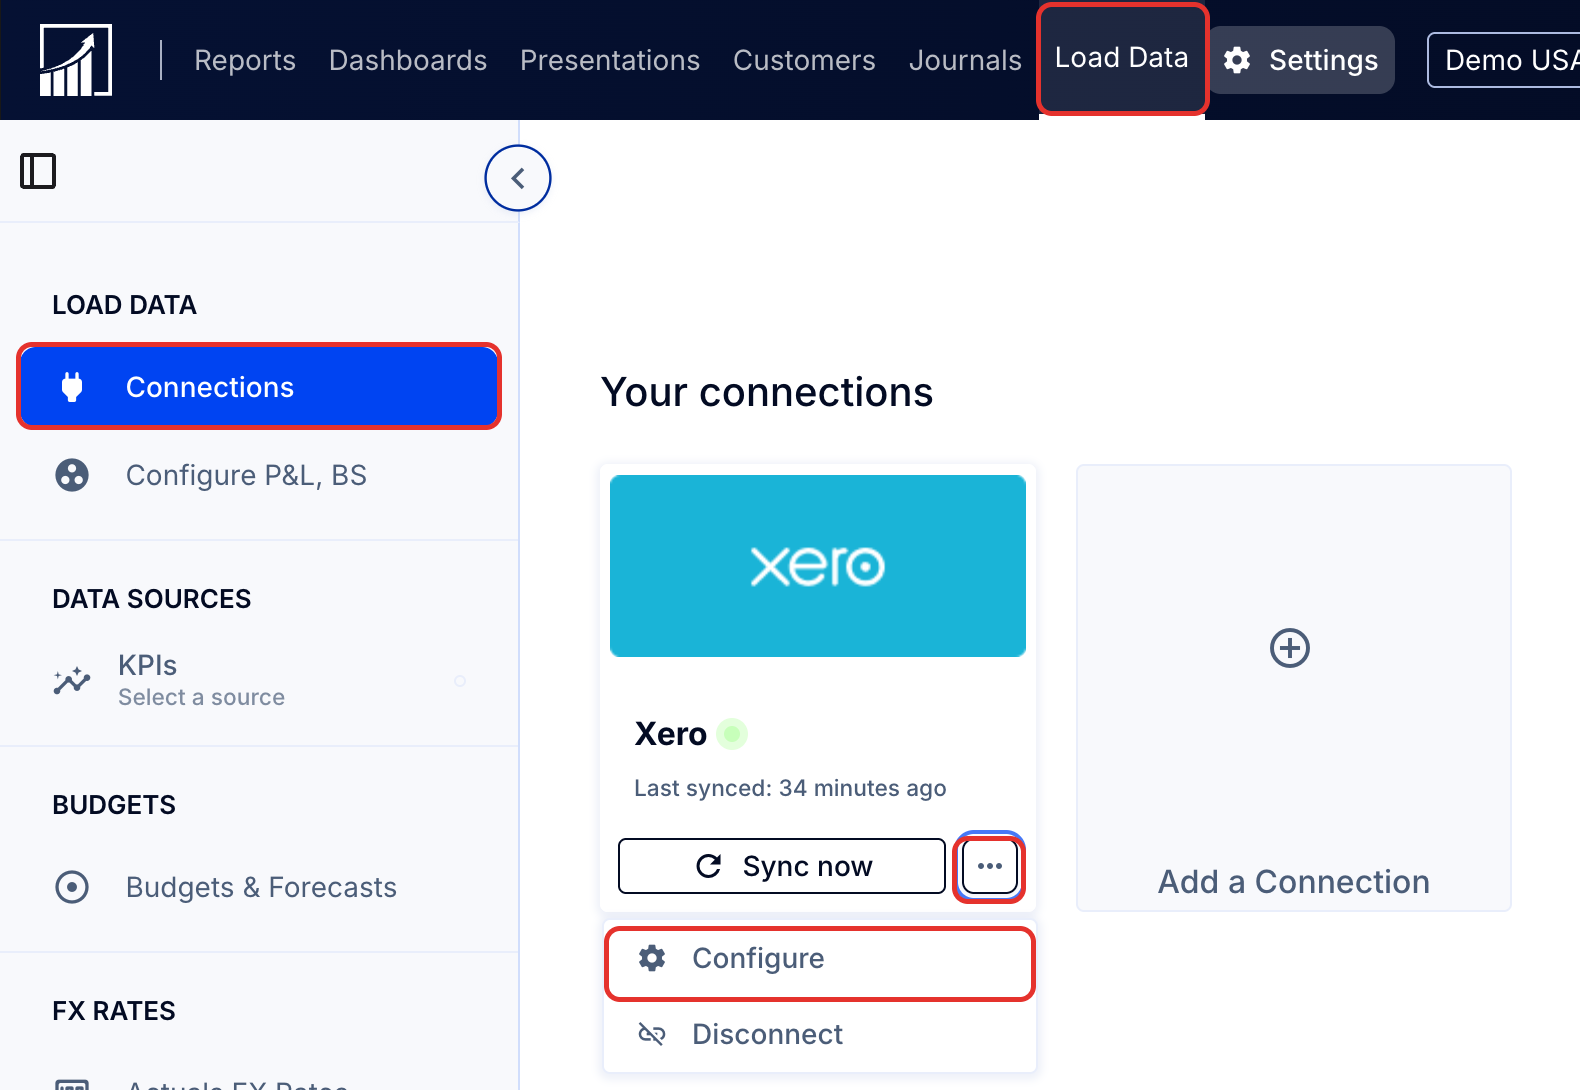
- Financial Data (P&L, Balance Sheet): Choose a Start Date for your P&L and balance sheet data (accounting data). We recommend using the start of your financial year going 1-2 years back.
- Invoice Data: Select a Customer Start Date for invoice level detail. Choose a date which includes the earliest sales invoice impacting the deferred revenue and customer analysis you wish to review in ScaleXP.
- Tracking categories/Classes/Tags: If you use Xero Tracking Codes, Zoho Reporting Tags or QuickBooks Classes and wish to have those imported to ScaleXP, turn on the toggle for Import tracking categories.
- Budgets & Forecasts: If you wish to import one or more budgets from your accounting system, turn on the Auto Sync budget data and select the Start Date and End Date for the budget(s) you wish to upload. (You can upload budgets outside your accounting system later.)
- Date format: If your invoices use the American date format (Month/Day/Year), then change the Date Format default, initially set to the British/International system of Day/Month/Year.
- Click Save.
Note: After the first import, the history start dates and date format are locked so your reports stay consistent (contact [email protected] to bring in earlier history). You can review the settings any time under Configure, change budget imports, and use Advanced settings for bank transactions and how many months the daily sync refreshes. Click Save changes after any change.
3. Sync your data
- Click the Sync now button.
4. Set your financial year start month
If your financial year starts in a month other than January:
- Go to Settings (top right) > Organization settings (left sidebar).
- Click the Edit button for Define Your Financial Year.
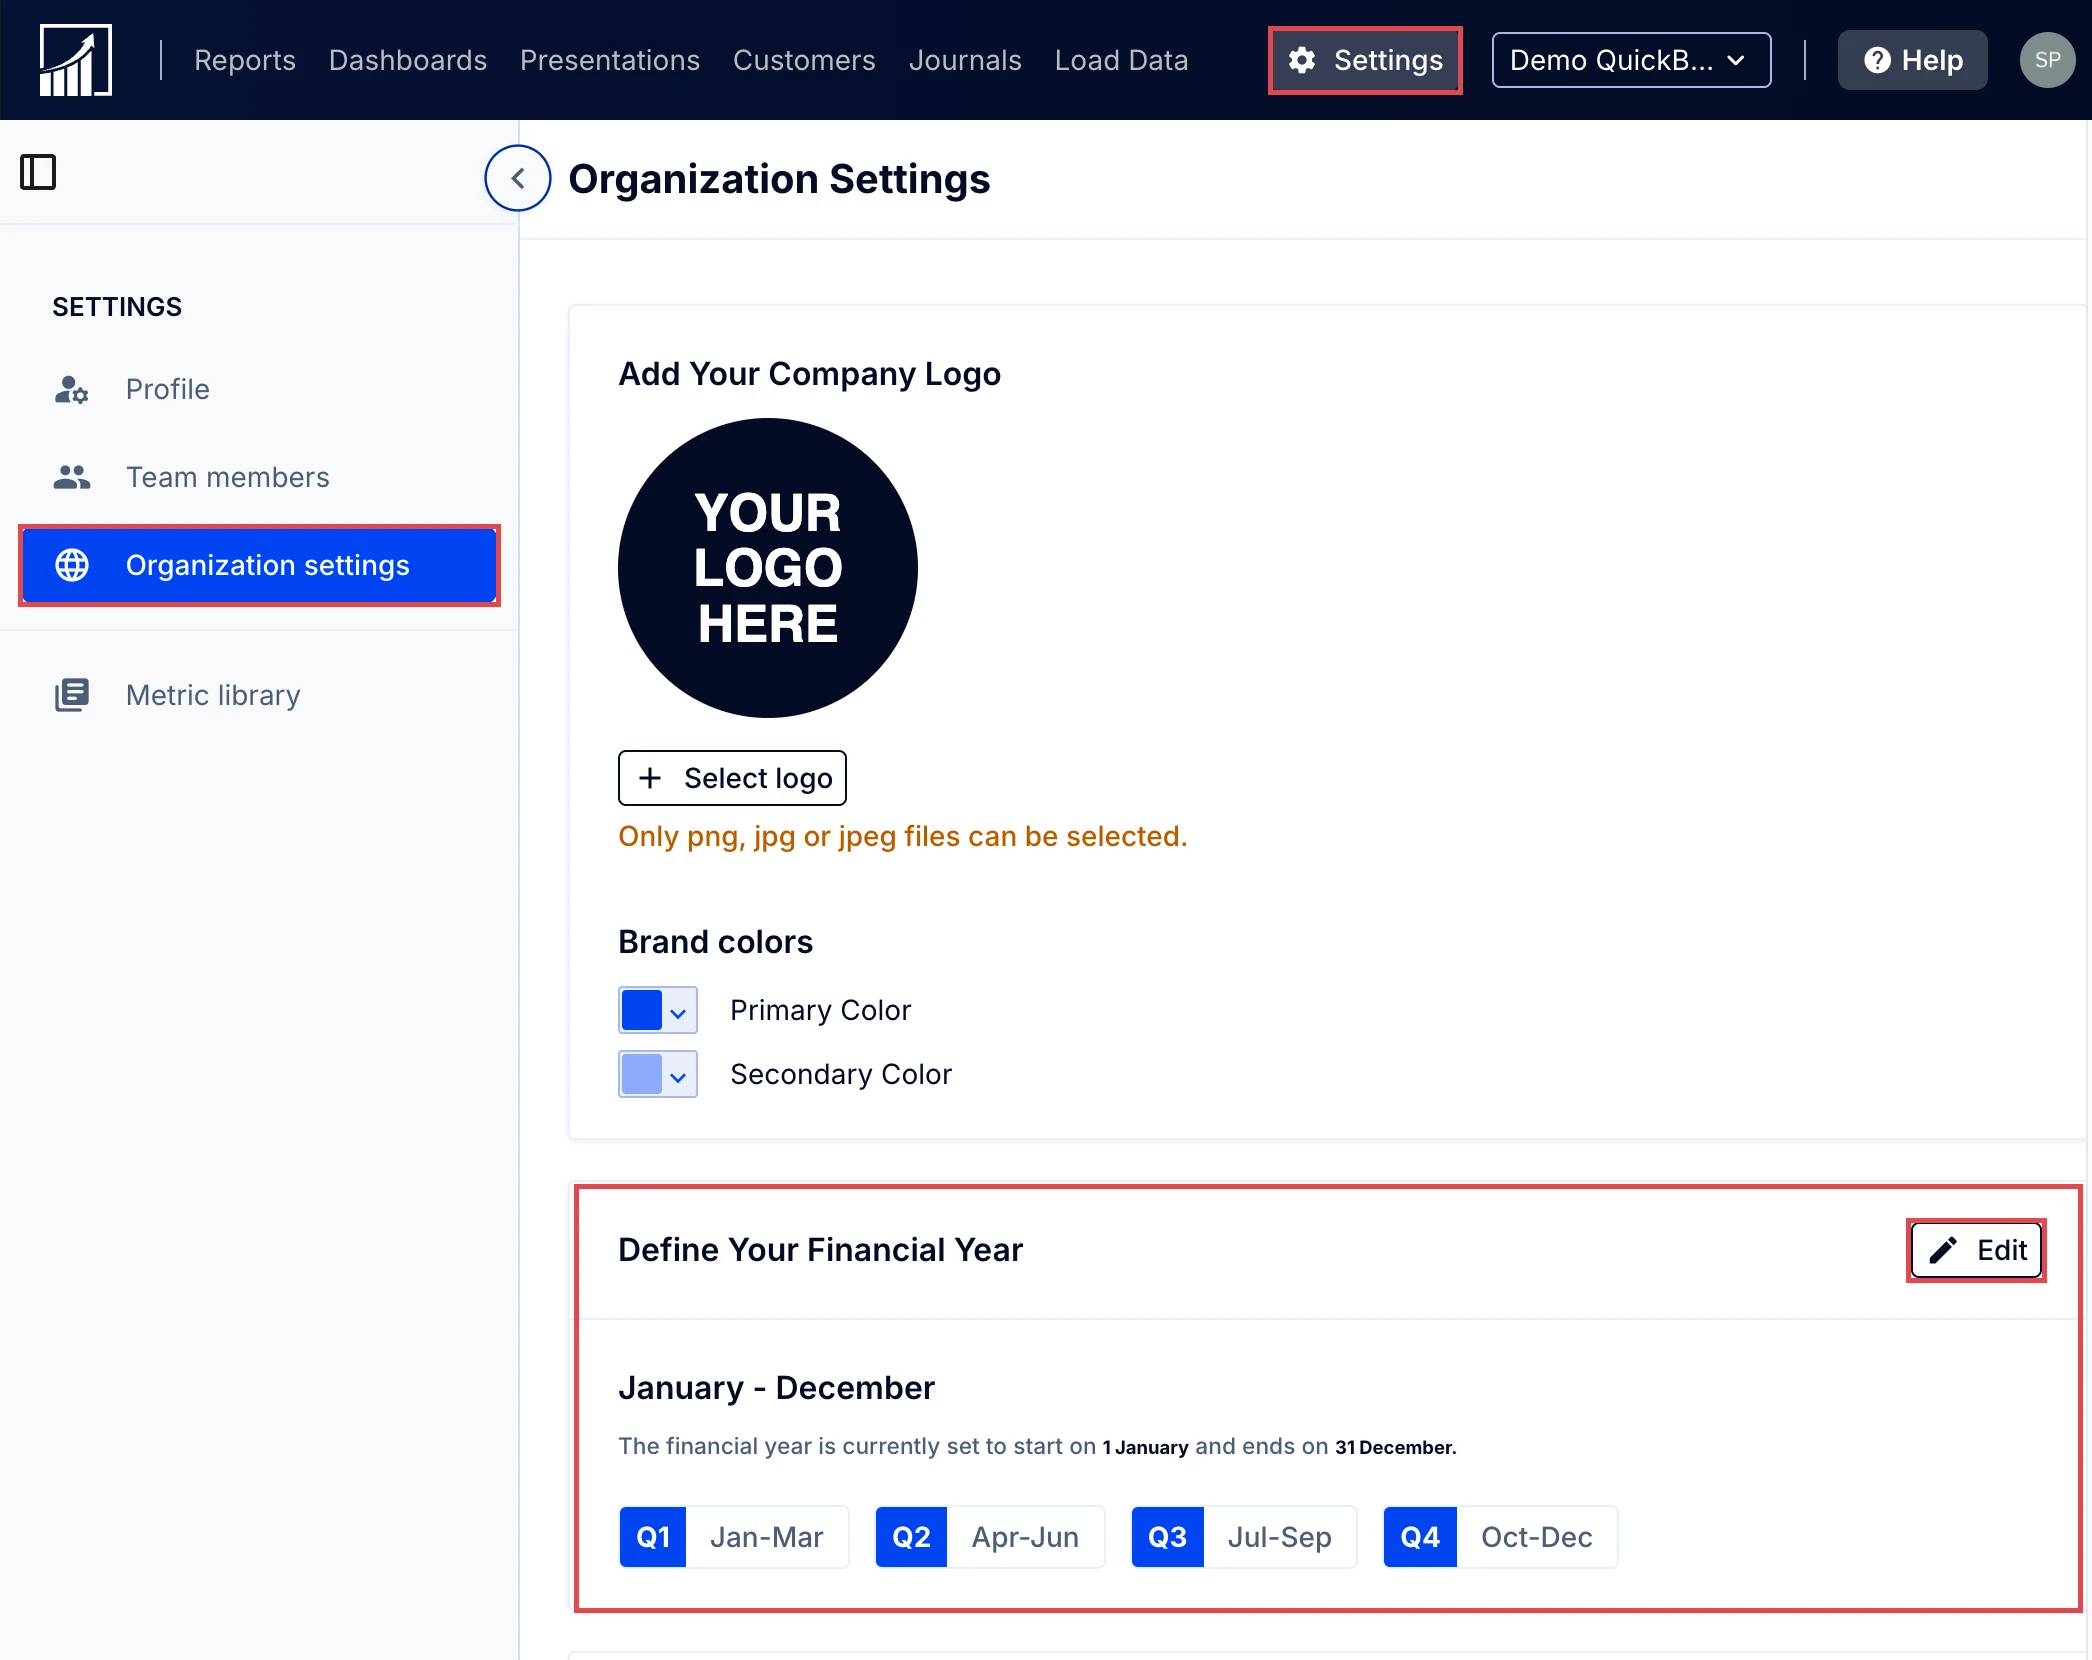
- Choose the month in Start of financial year, then click Save.
Note: Repeat these steps for each entity in a consolidated company.